2.Click on the first column and give Column heading as
<tr><th style="font-size:20; color: Red;">Employee Name</th>
Click on formula and specify this formula
value:=empName;
"<td><input type=\"checkbox\"/>"+ value +"</td>"
3.Click on the second column and give Column heading as
<th style="font-size:20; color: Red;">Employee Number</th>
Click on formula and specify this formula
value:=empNumber;
"<td>" + value + "</td>"
4.Click on the third column and give Column heading as
<th style="font-size:20; color: Red;">Department</th>
Click on formula and specify this formula
value:=department;
"<td>" + value + "</td>"
5.Click on the fourth column and give Column heading as
<th style="font-size:20; color: Red;">Section</th>
Click on formula and specify this formula
value:=section;
"<td>" + value + "</td>"
6.Click on the fifth column and give Column heading as
<th style="font-size:20; color: Red;">Designation</th>
Click on formula and specify this formula
value:=designation;
"<td>" + value + "</td></tr>"
7. Create a new form named $$ViewTemplate for vwCheckBoxEmpDetailsBlog ,
Note here vwCheckBoxEmpDetailsBlog is the view name created above
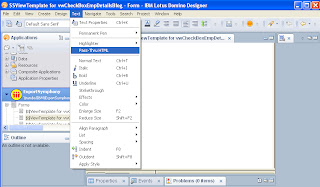
8.add html tag <table> inside the form .Then goto text then select pass thru HTML.
9.Embed the view below the <table> tag.To embed the view click on Create-Embedded Element-View.

10.Select the view created and click ok.

close the table tag </table> .Select and pass thru html
11.right click on the embedded view and in web access-Display-Change the type to Using HTML
12.Now run the form-Click preview in web browser-firefox.The web view will be displayed in the browser


No comments:
Post a Comment